
Flooding Hobbiton Part 1: Saved views and static imagery
- Flooding Hobbiton Part 1: Saved views and static imagery
- Flooding Hobbiton Part 2: Closing the wormhole
- Flooding Hobbiton Part 3: What’s new in HEC-RAS 5.0.4
Much of what was previously done to support HEC-RAS projects in QGIS, ArcGIS, MapInfo, or other CAD/GIS products can now be done directly in RAS Mapper; for this article, we’ll cover setting up saved views and static aerial imagery in RAS Mapper.
Here’s what we’ll end up with:
One of the major advantages of HEC-RAS is the ability to share project files back and forth between consultants, clients, and stakeholders without licensing requirements or costs. But how can you make sure your project is going to look the same when someone else opens it?
One item that can seriously affect the displayed results is the loss of web imagery. If you have used web imagery in RAS Mapper before, you’re probably used to seeing the red dot appear next to layer name, which means you’ve either zoomed in too far or have lost your internet connection.
You may run into this problem if you’re trying to show a demo of your project animation to a client in their office but don’t have their wifi details – and your phone’s hotspot is too dodgy!
If you want your background to appear exactly the same way every time, save a static image at each zoom level and turn off the web imagery altogether.
We’ll walk through the process here using the Shire of Hobbiton in New Zealand.
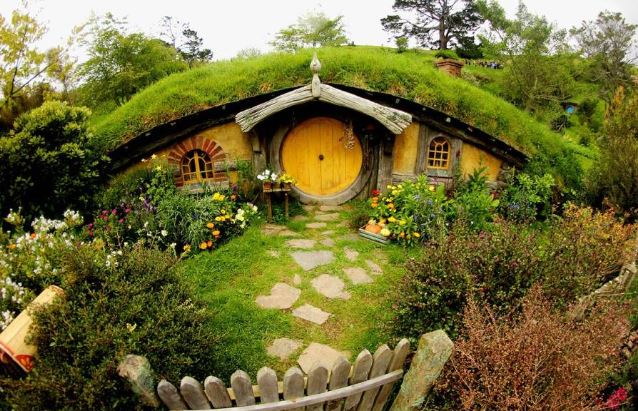
The entry fee will cost you nearly as much as your airfare, but next time you visit New Zealand, you may want to take a drive to see the Hobbit movie set near Matamata:
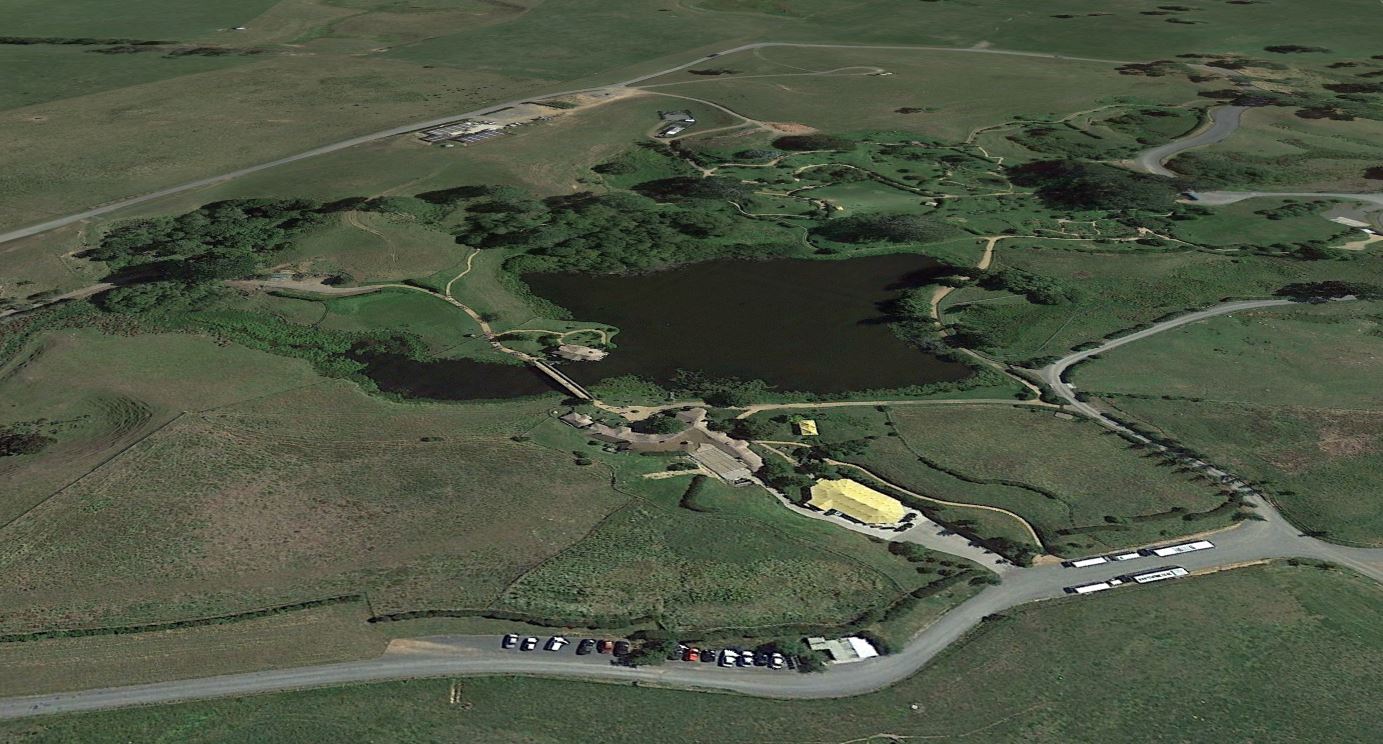
If a trip isn’t in your cards, you can try a virtual Google fly-through (go to Lat -37.859 Long 175.689). We’ll use the terrain and aerial imagery from this location for the following exercises.
[Feel free to set this up yourself if you want to give it a go. If you want more detailed instructions on creating a new HEC-RAS project, go to our workshops page and download Workshop #1 first.]
Here are the steps:
Step 1. Download terrain data. Google “New Zealand 8m elevation”, click on the LINZ server link, and download tiles GL and GM under “Tiles Table”.
Step 2. Download projection file. Google “NZGD 2000 projection” and download the 2193.prj file from spatialreference.org. [Best to rename this to NZGD_2000_Projection.prj or similar and put the file in its own projection folder to avoid any later confusion.]
Step 3. Make a new HEC-RAS project in SI units. For this exercise I’ve called mine “Hobbiton”.
Step 4. Open RAS Mapper and set the projection to NZGD 2000.
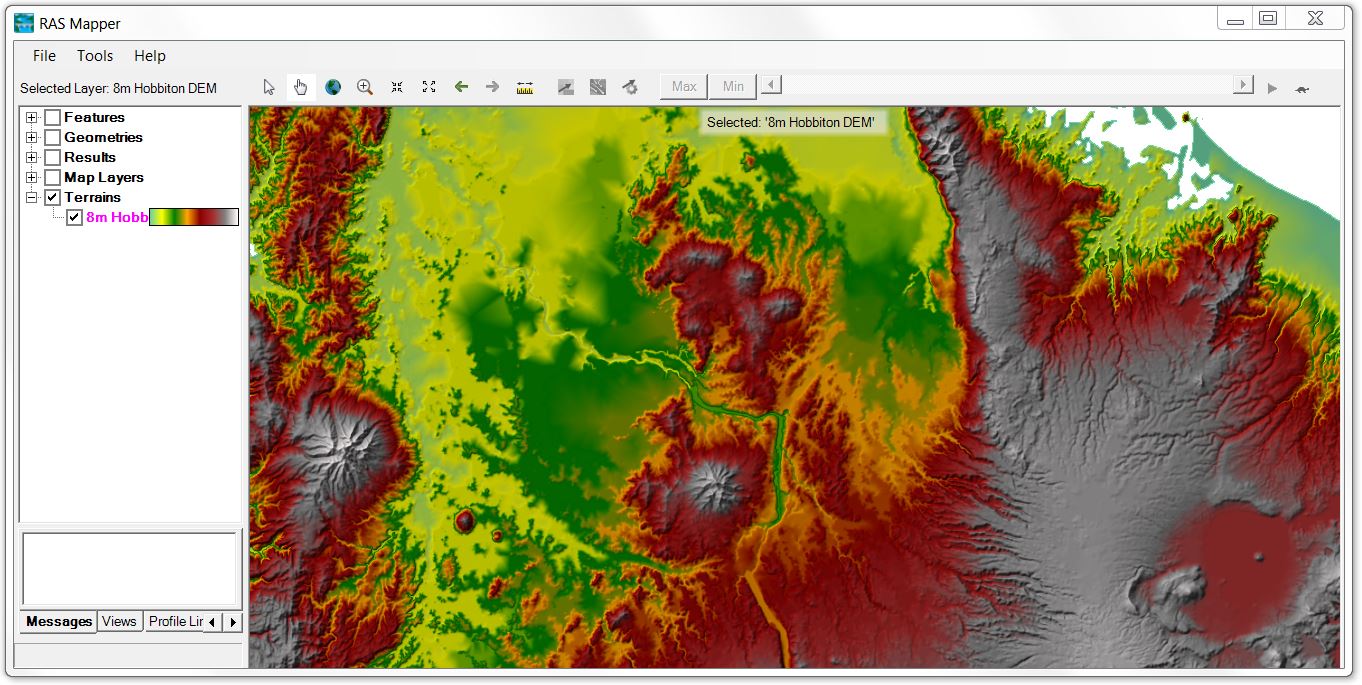
Step 5. Create a new terrain file using the downloaded tiles, then zoom to layer. Here’s a screenshot of mine:
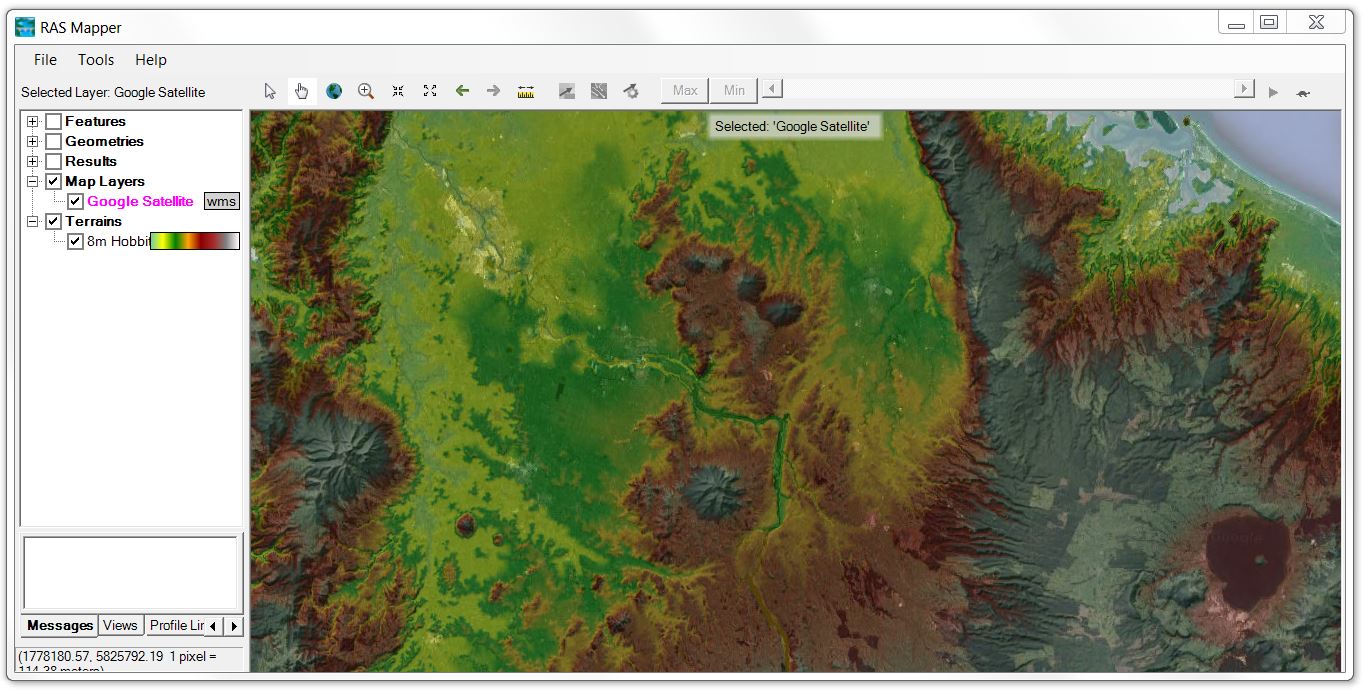
Step 6. Add Google satellite image by right-clicking on Map Layers and selecting “Add web imagery.” Adjust the transparency to show a combination of terrain and imagery:
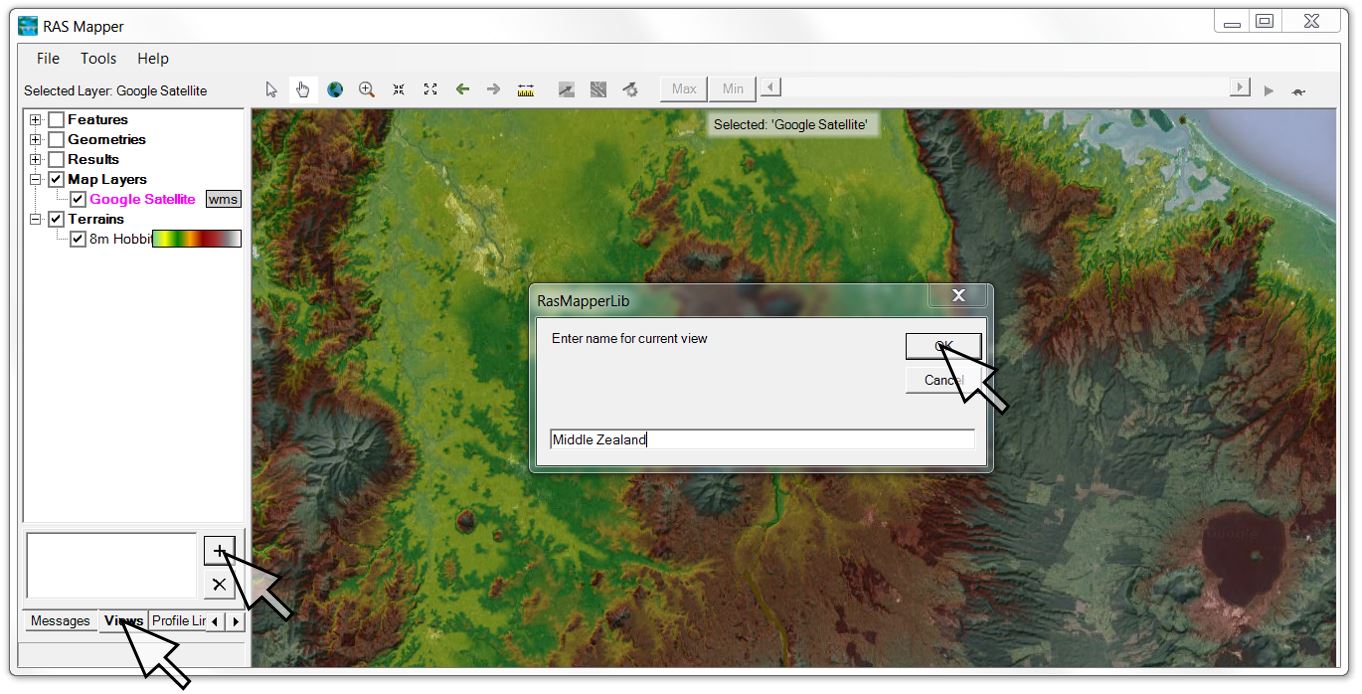
Step 7. If you’re happy with the view extents, click on views, then the plus button. Assign a descriptive name to the overview extents:
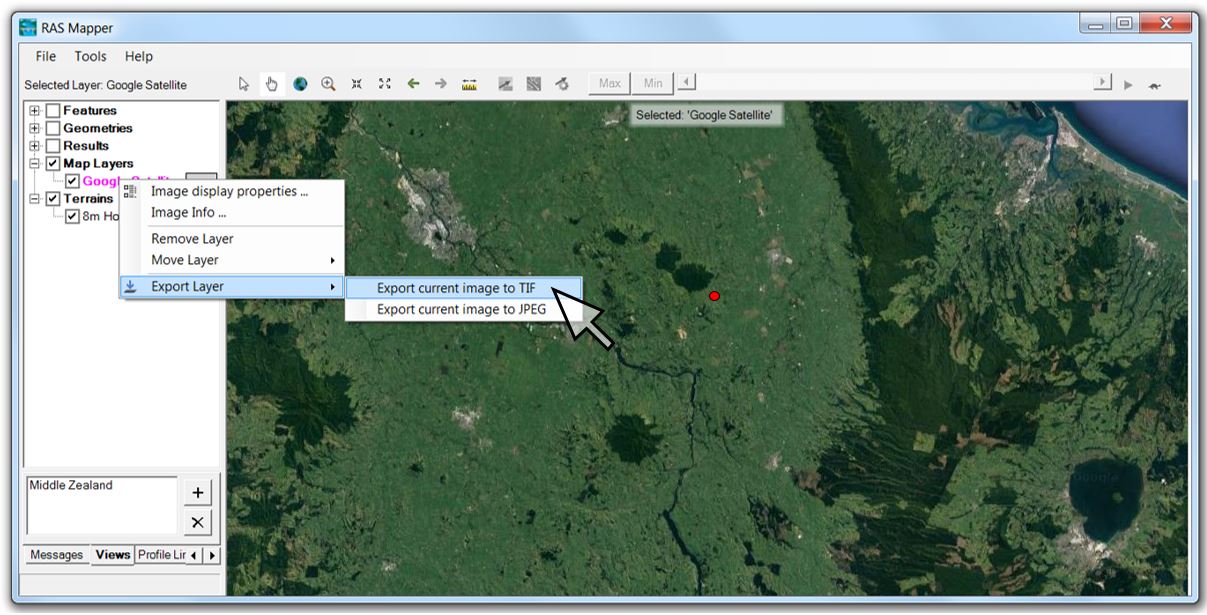
Step 8. Right-Click on Google Satellite and then select “export layer to TIF”. Best to save the static image to an “aerial” subfolder to keep things well organised.
[The tif option saves a geotif with the georeferencing embedded in the metadata, whereas the jpg saves the image along with a jgw world file, which is helpful if you want to make adjustments to your spatial reference later. Also keep in mind that any transparency will be saved into the static image, so I generally make the image opaque first – you can always assign a new transparency to your static image later.]
The red dot in this screen shot shows the location of the movie set with the City of Hamilton in the upper left of the image:
Step 9. Now we’ll repeat the process for two additional zoom levels:
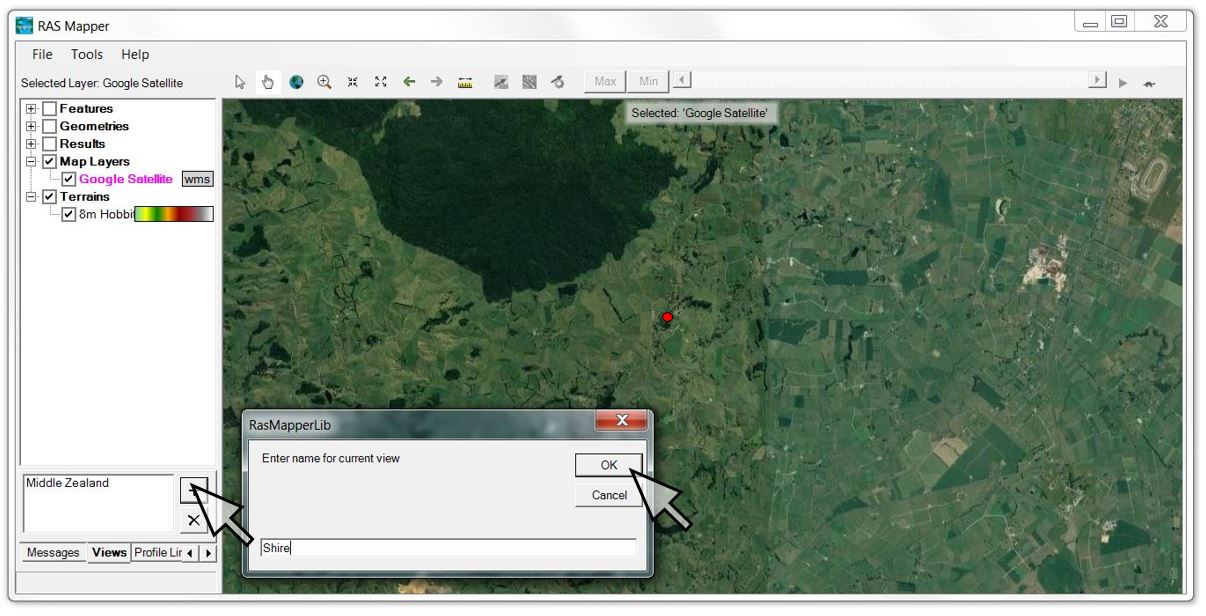
The red dot in the image below shows the location of Bag End:
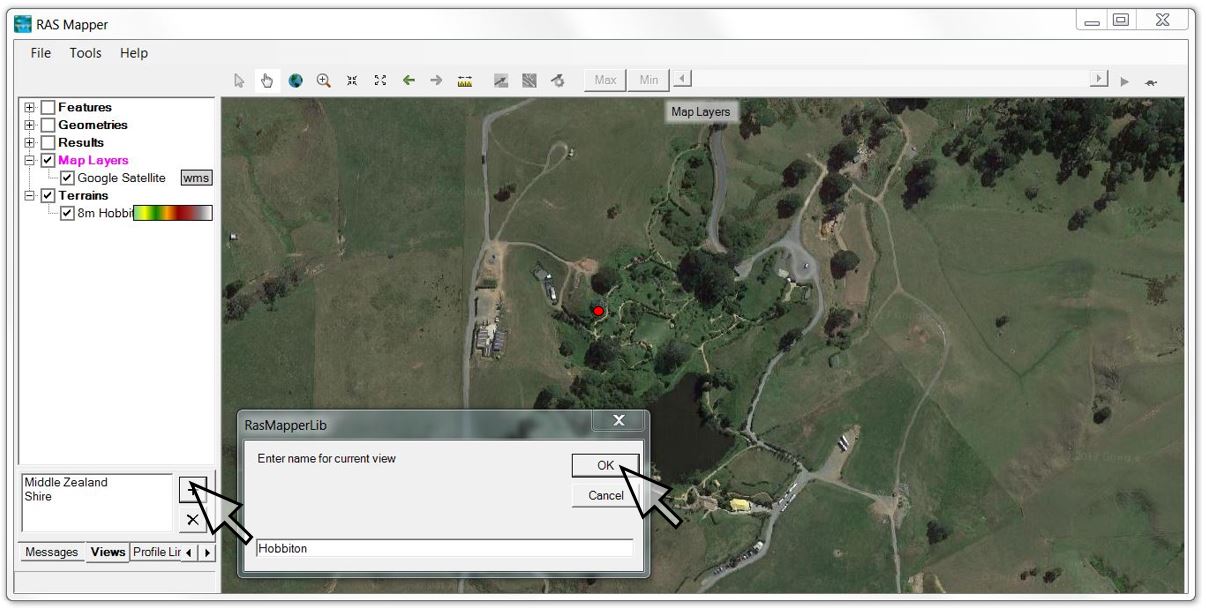
Step 10. Zoom to the remaining views and export a static image of each as described above. Double-click on any of the listed view names to revert back to the saved view extents.
[It’s best to line these views up with the extent of available detailed survey or areas of interest for animations or report figures if you plan to screen-shot them from RAS Mapper. If you’re going to use these view extents to make figures later, try not to change the proportions of your RAS Mapper view window once you have set your views.]
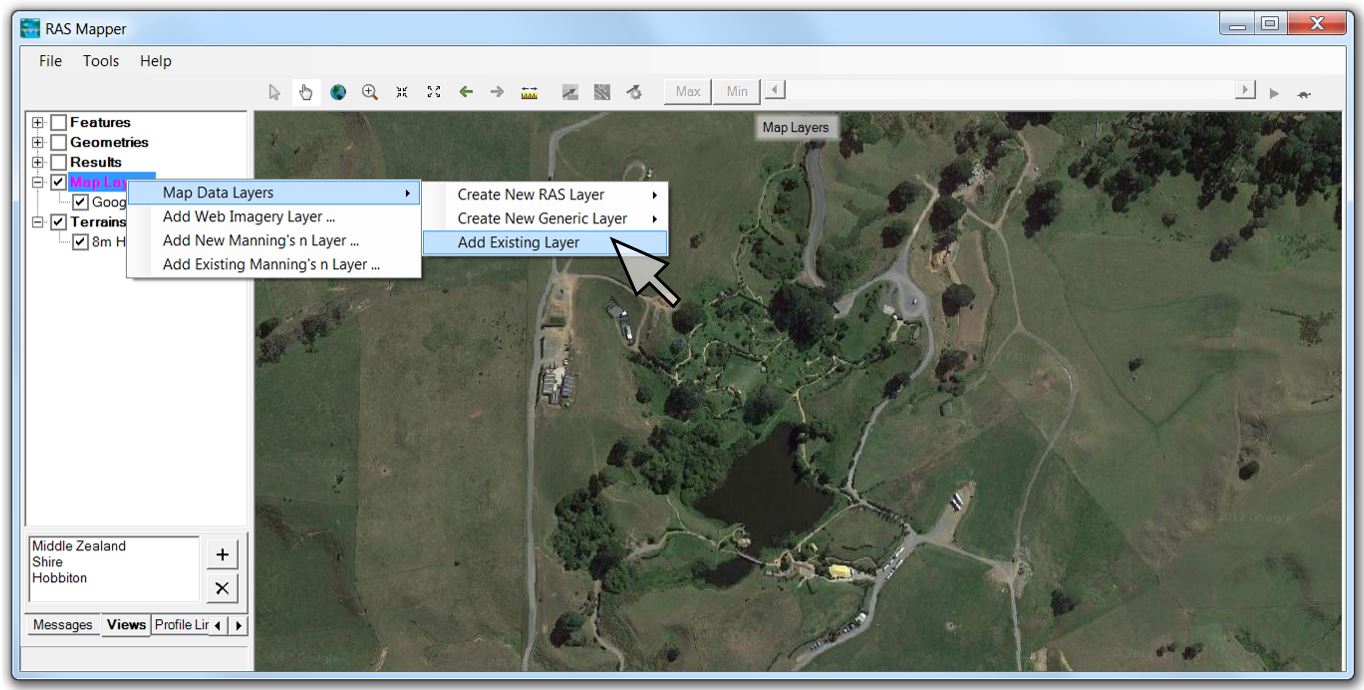
Step 11. Add the views as existing map layers:
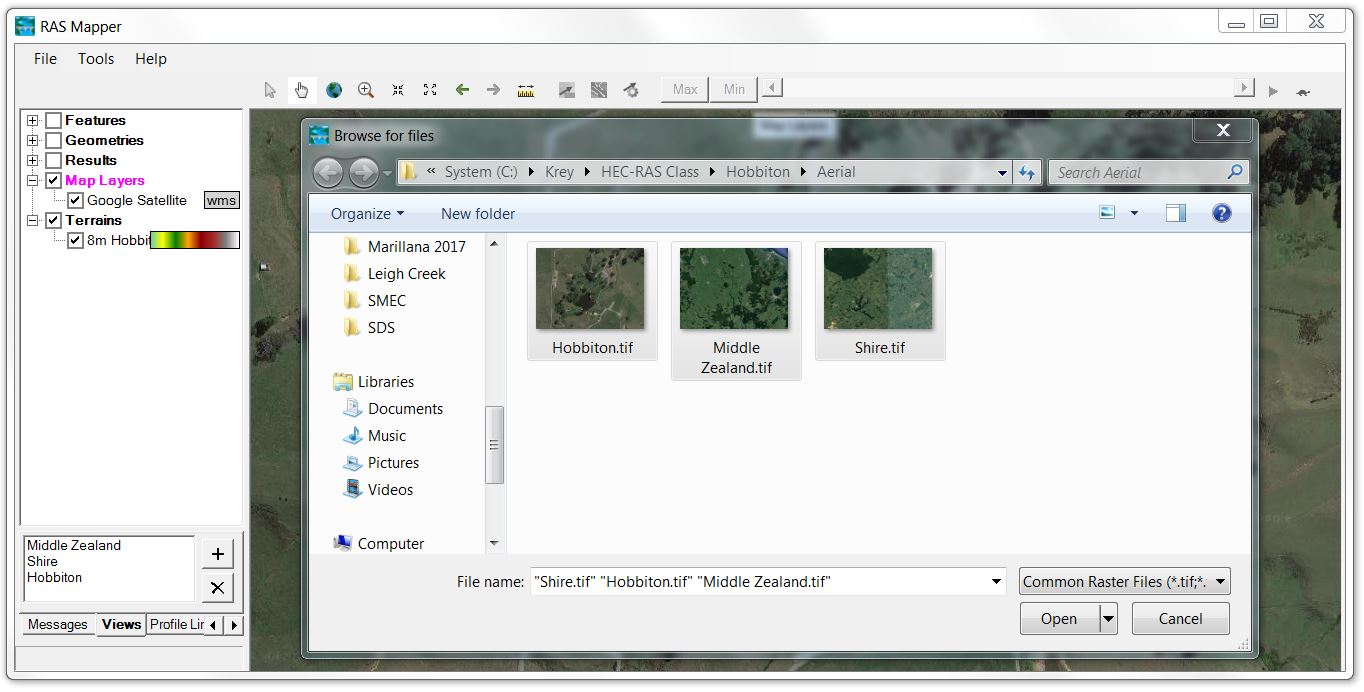
Be sure to scroll down to common raster file types to view the static images:
If you select multiple files at once, you’ll get this prompt:
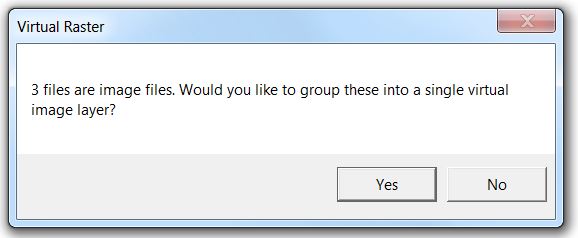
If the images are tiled next to each other, I would stitch them together, but stacked images with different resolutions can make a stitched image appear disjointed. So for this case I’ll say no.
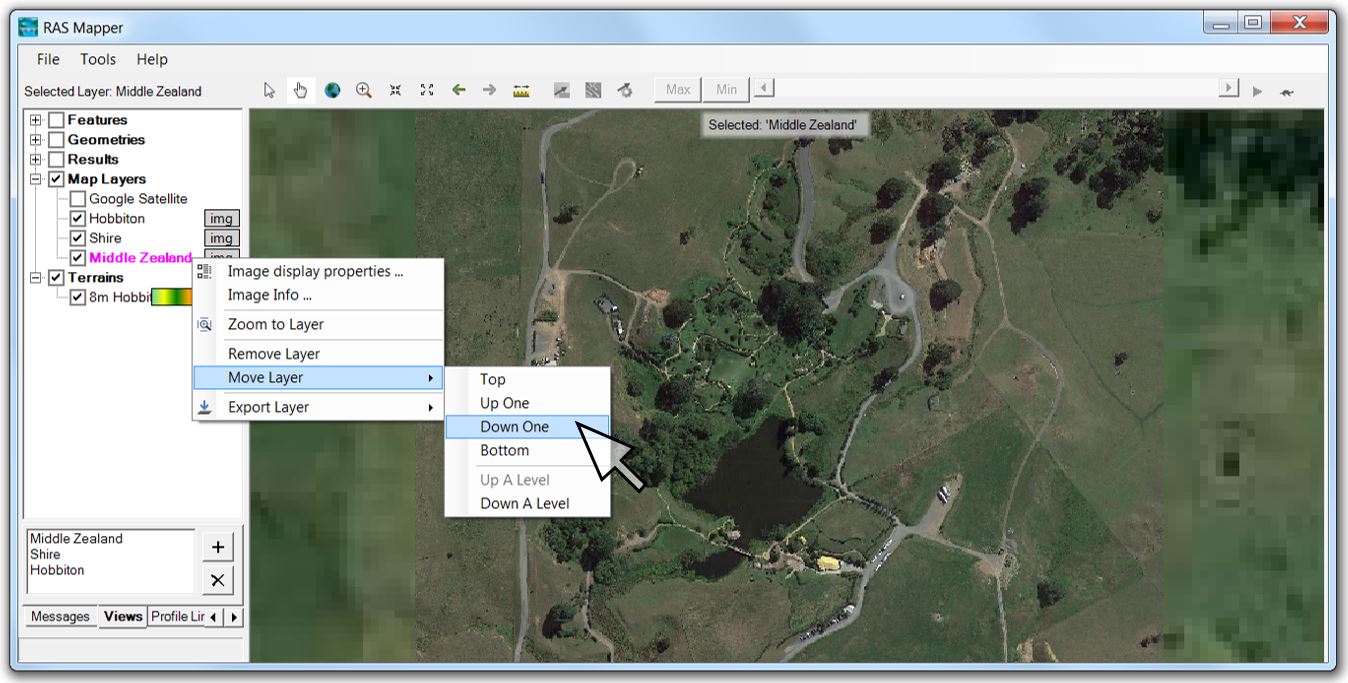
Step 12. Turn off Google Satellite to confirm that the static images have been added. Move layers in order of decreasing resolution and adjust transparency as desired:
Step 13. Scroll through the views to confirm the extents. Here’s a video:
Remember that static images are not pyramided like a Google image would be, so be sure to save a static image of each zoom level you might need. So there you have it: rinse and repeat as many times as you need!
Hope this is useful to your modelling efforts!
Stay tuned for further articles on using RAS Mapper as a GIS tool, but first we’re going to use this same data set for a comparison of culvert methods and a demonstration of the new features in HEC-RAS 5.0.4.
Subscribe for notification of additional articles or contact us with any questions.
Krey Price
Surface Water Solutions
- Flooding Hobbiton Part 1: Saved views and static imagery
- Flooding Hobbiton Part 2: Closing the wormhole
- Flooding Hobbiton Part 3: What’s new in HEC-RAS 5.0.4